Showing posts with label nails nails nails. Show all posts

Sunday, September 02, 2012

Cute simple polka-dot pattern nails version 2 tutorial


Hey there.

I am BACK!
With another nail version of the polka-dotted pattern. This look is slightly different to the usual polka dots as it is more dense. Click on this link if you want a makeshift dotting tool.


I decided on a white base so that my colourful dots will stand out. A word of caution if you decide to do the same, any imperfection will stick out like a sore thumb.

I have received a fair few compliments from friends and strangers alike. They were cute but also classy.
Most people have told me that liked the combination of green and purple, as well as the blue and purple (thumb and index finger respectively), but you can play around with what you have available.


I've added a quick tutorial guide in case you're interested in replicating this pattern.
Click on it to enlarge it.


 With a bit of practice, you'll get this.


I also tried it on a dark cherry red base, with pink and white dots. It reminded me of rocky road chocolates!


I personally prefer the dark base as I can get away with mistakes ;P


Hope everyone's enjoying their weekend!

Thursday, April 26, 2012

Cute Penguin Nail Art

I saw this these penguin nail designs while back and promised myself to try it one day.

Well, the time has finally arrived and they were good fun to make and so uber cute!! ♥♥♥♥


It's so simple, just painted white over a base colour. Wait for it to dry (I didn't, as I was to eager to create the penguins and ended up with wonky eyes) and then proceed to dot eyes and slop on some orange.

You could go with a black base but personally, I think I prefer lighter colours as they are more pleasing to the eye.


I used Rimmel's Grey Matter as my base.


As you can see I made two kinds of penguins: a chubby baby and an adult one


Cute, no? ♥


Monday, March 12, 2012

Black and white dolly wink inspired nails


 Am loving my latest nail designs! ♥♥♥♥♥


       Left hand ♥


   Right hand ♥


I've been playing with konad stamps again. I am very pleased with how they came out.
It's always a little messy with konad stamp kits but I really think it's worth it.

One of my birthday gifts was more konad image plates; but not just any regular plates, these were massive!!!
*drooooooooooool


In Hong Kong, I could see Dolly Wink products everywhere! Unfortunately I succumbed to it all and purchased one of Tsubasa's dolly wink lashes (No.1 Sweet lashes) DESPITE the fact that I don't often use false lashes and still have trouble putting them on :(


So I purchased cheaper ones to practice until I've mastered putting falsies on and my reward will be dolly wink lashes. *fist pump


Yeah, okay, it probably won't make any sense to some of you... but look at the packaging!


I am such a sucker for pretty packaging ;)

Anyho, together with the kit that good ol' Yenners bought for me, I managed another attempt at Dolly Wink inspired nails. It's all about polka dots, pretty ribbons / bows, and lace; all things girly and cute!


It came out much nicer than my first and second attempts; mainly because konad art stamps create much cleaner lines than free-hand nail art and nail art pens.


Hope everyone's had a good weekend.
We in Victoria are enjoying our long labour-day weekend, or at least I am ;) ♥


Friday, March 09, 2012

25


O hai! I have returned!!


Sorry, I was away on a week-long business trip in Shanghai and Hong Kong ;)

It was fourth time to HK, but first time I've visited China.
Shanghai was great! I thoroughly enjoyed myself because the staff in Shanghai were ace!!
I miss them already! :(

Anyway, you don't really want to hear me talk about work! I'm sure you want to see my shopping haul!


Makeup did cost me a fair bit but still MUCH cheaper than if I purchased them in Australia!
Majolica Majorca mascara was half price at AU$15!!


These were less than AU$2 each!


I love crowns!


 Love these bags! They both cost less me than AU$60!


 Anyway, guess who turned 25?!
 

Unfortunately I had to leave for my conference the day after my birthday, but it didn't matter. I spent it with my Joshy ♥

Hmm.. actually when I think about it, I met him when I was 20
So in a month and a half's time, we will be celebrating our 5th year anniversary together.


Ah... life is good ;)

Saturday, February 18, 2012

Re-creating colourful leopard print nails


I just noticed that I've been tagged by bambino (entry). Whoops!!!
Will definitely get around to it. One day.

Ahem.


I absolutely fell in love with this colourful leopard print nail pattern when I saw it.
So eye-catching and different! ♥


Although they received plenty of compliments, they could not even come close to the original, created by letthemhavepolish.com. You should most definitely check her blog out for inspiring nail creations!! ♥


http://www.letthemhavepolish.com/2011/10/31-day-challenge-day-13-animal-print.html


That photo alone is enough to stir one's interests in the sponging technique to achieve the gradient effect. I used makeup sponges to create soft and delicate gradients but I obviously need more practice as I found it very messy and I kept ruining my nails. T___T

Will definitely play around with it more in the future ♥

I am really thinking of purchasing the M57 konad image plate because I can never re-create such clean lines myself! It's only US$2.50 from Amazon! I wish we have something like that in Australia. MEH.
Anyway, that's all for today. I have a good excuse; am attending a wedding reception this afternoon! Looks like a gorgeous day ;)


Hope you're having a good weekend!

// ♥

Thursday, January 05, 2012

Dripping nails Version 2: Candy nails


Loved my dripping nails so much that I decided to do a cute fun summery version!!

In case you missed my previous tutorial, and want to re-create one yourself, please see my previous entry or click here [Clicky]


Quick and easy PLUS it's a forgiving design since the nails do not need to be symmetrical.

I also like working with the clear coat, since you don't have to worry too much about messing it up. Just wipe away any mess/mistakes with a cotton bud soaked with nail polish remover.


COLOURS!


Hope everyone's had a good start to the new year so far ;)


Sunday, December 25, 2011

Cute D.I.Y Dripping Nails Tutorial

Merry Christmas everyone! ;)

Just a quick post today! Since my dripping nails drew a bit of attention, I wanted to show you how you can re-create it without any tools whatsoever.


So basically you'd need to select two colours; one as a base, and the other to create dripping tips.


Here I'm using Rimmel's Mocha Fever which is a gorgeous rich colour with tiny flecks of glitter embedded to give it an extra dimension, and Rimmel's London Clours as my "snow/vanilla" drips.


Step 1: Start with your base colour.
This is how it looks with two coats of Mocha Fever.
 

Step 2: Using your second lacquer, draw downwards (to the tip of your nails) on either sides of the nail. Best to have drips of varying heights and always start from 1/3 or 1/4 from the tip of your nails.


Step 3: Connect the drips by going over the tips of your nails. Don't worry if it's messy. It's supposed to look that way.

Finish with a top coat and you're done! ;)


I hope everyone's having a great safe Christmas.
Spotted this cute car yesterday!! :3

Happy holidays!!


Wednesday, December 21, 2011

Aussie Blogger Kris Kringle ♥

So I participated in an Aussie Kris Kringle for bloggers recently. At first I was kicking myself because I always get a little stressed when I have to get something for someone I don't really know, but after going through my Kris Kringle's blog, I kinda had an idea of the things to get her :3

I will reveal to you who I got at the end of this blog entry ;)

Anyway!! My Kris Kringle arrived a couple days ago and I found that it was the awesome Jen from QuestJen!!

I felt like she really made a lot of effort into putting my pressie together.I got some nail items; lace nail deco and a nail polish, plus an eyeliner, makeup palette (I know right!!) and a L'occitane hand cream sample.


I even got a card from her!! I didn't send one to mine +___+
Jen wrote such sweet things in the card, made me feel warm and fuzzy inside :)


I was so pleasantly surprised to find a makeup palette inside. Very useable colours! Love it!


So sparkly and pigmented! I used it immediately!

To create this!
Looks so yummy huh??


I loveeeee nail lace designs! Thank you so much!!


I got such great items that I felt ashamed of the things I purchased for my chosen kris kringle, Teresa from myteeefine.com [clicky here to pop over and have a look see ;)].
Fortunately for me, she seemed to like the items :)

In all, it was a very good experience because I had never participated in blogger activities/events. It was good fun and I'm glad to be introduced to new bloggers.

Can't wait for next year!!! :D


Thursday, July 28, 2011

Bundle Monster Konad Nail Plate Review (21 piece set)

Squeeeeeeeeeeeeeeeeeeeeeeeeeeeeeee!

Check this out!!


Oh yeah.. pretty awesome right? I purchased the 21 piece Bundle Monster Konad image plate set from Amazon for about US$18 not too long ago cause I wanted to experiment with more Konad nail designs.

It was my first time purchasing off Amazon and it was really easy! Postage didn't cost much either, approx. US$4 and it took about a week or so to arrive.

The Bundle Monster set is a cheap knockoff of the Konad plate set. I thought they would be filmsy metal plates but they are actually as good as a genuine Konad plate!

There is a thin blue plastic film protecting each plate which is easily removed.


Each image plate has a unique number on it, just like a konad plate.


Each plate also has 6 - 7 designs, just like a Konad plate .


I have used 5 plates without encountering any problems so far but upon closer inspection of all the other plates, I did notice a slight inconsistency in one pattern. However, I'm not bothered by it because it's hardly noticeable once you stamp the design onto your nails.

This set is a partial set, which includes the BM1 - BM21 image plates.
Personally, there will be some designs of this particular set that I doubt I would ever use but I still enjoy having a variety of choices.

Now, I don't actually own a full Konad image plate set so I can't exactly compare but looking at some samples online, there will be a lot of designs I probably won't use either.

click on the photo to enlarge!
In all, I'm really satisfied with my purchase *prances*


And in anticipation of my upcoming snow trip in Falls Creek, I've created cute wintery snowflake nails.
 

Uber cute? Hell yeah! :D

Can't wait to make snow angels, snowmen and have snowball fight(s)!


// ♥

Saturday, July 16, 2011

DIY Nail dotting tool

As you should know by now, I am a big of polka dots.
And I love love LOVE polka dotted nails!

To cheer me up during this cold winter snap, I decided to add a little jazz to otherwise dull-looking greys.


I can be a real cheapie so instead of purchasing nail dotting tools and accessories, I just made my own.


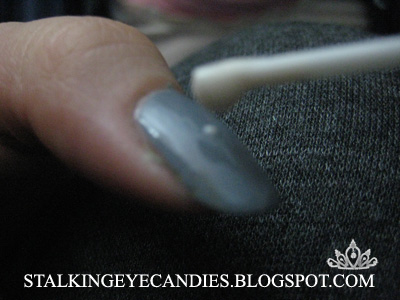
By using a cotton bud (or a Q-tip by others), I am able to create my own custom dotting tool. Just simply remove one end of a cotton bud. Tip: It's easier to remove when the cotton is wet.


Once it's clean, it should look like this.

Now, I painted my nails prior to removing the cotton... which is rather stupid since I had a good chance of ruining my freshly painted nails but I've got mad awesome skills so no problems there.


I usually use a base coat underneath my polish. I used Rimmel's Grey Matter, which I find very true to grey without a hint of blue tones. The brush is wide, making application a breeze. 

I used one generous coat as I plan to use a top coat.

Just dip the naked end of your cotton bud into a white/cream nail polish, making sure you have a small dollop of laquer. You can test the size of the dots by dotting onto a piece of paper.


Unfortunately, you will end up with some dots larger than others if you are not careful, but I actually like irregular sized.

Now, polka dots are evenly spaced so to make sure you get nicely distributed dots, always start with one in the middle of your nail.


The middle dot will act as your marker. Much like the 5 dots on the face of a dice, the middle dot is framed by four dots, one at each corner of the dice

I find this much easier than just randomly dotting on a nail. More often than not, five dots are sufficient but if your nails are long-ish, you can place a sixth dot at the edge of your nail.

You have to be very patient afterwards as dots tend to take a lot longer to dry since they're blobbed on.

Once they've dried, use a clear top coat to seal and protect them!


Have a good weekend everyone! 

Saturday, May 21, 2011

Colourful candy stripe nails


I know it seems like I do my nails ALL the time but the truth is, I have been neglecting my nails for quite a while now. 

For the past two weeks, we have been flat out at work so I just couldn't be bothered to even cook at home, let alone do my nails.

I managed to find a bit of time today to do a more colourful version of my orange candy striped nails.


I love bright nails that pack a punch! 
They certainly do a good job of uplifting my spirits! ♥


Have a good weekend everyone!


//♥
Related Posts Plugin for WordPress, Blogger...