
As you should know by now, I am a big of polka dots.
And I love love LOVE polka dotted nails!
To cheer me up during this cold winter snap, I decided to add a little jazz to otherwise dull-looking greys.

I can be a real cheapie so instead of purchasing nail dotting tools and accessories, I just made my own.

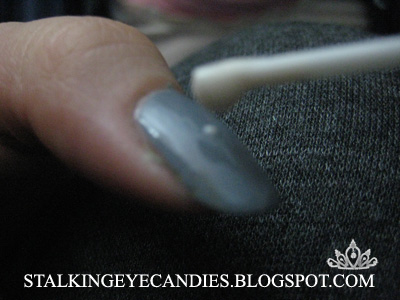
By using a cotton bud (or a Q-tip by others), I am able to create my own custom dotting tool. Just simply remove one end of a cotton bud. Tip: It's easier to remove when the cotton is wet.

Once it's clean, it should look like this.
Now, I painted my nails prior to removing the cotton... which is rather stupid since I had a good chance of ruining my freshly painted nails but I've got mad awesome skills so no problems there.

I usually use a base coat underneath my polish. I used Rimmel's Grey Matter, which I find very true to grey without a hint of blue tones. The brush is wide, making application a breeze.
I used one generous coat as I plan to use a top coat.
Just dip the naked end of your cotton bud into a white/cream nail polish, making sure you have a small dollop of laquer. You can test the size of the dots by dotting onto a piece of paper.
Unfortunately, you will end up with some dots larger than others if you are not careful, but I actually like irregular sized.
Now, polka dots are evenly spaced so to make sure you get nicely distributed dots, always start with one in the middle of your nail.

The middle dot will act as your marker. Much like the 5 dots on the face of a dice, the middle dot is framed by four dots, one at each corner of the dice
I find this much easier than just randomly dotting on a nail. More often than not, five dots are sufficient but if your nails are long-ish, you can place a sixth dot at the edge of your nail.
You have to be very patient afterwards as dots tend to take a lot longer to dry since they're blobbed on.
Once they've dried, use a clear top coat to seal and protect them!
Have a good weekend everyone! ♥
4 comments:
Wow this is way too cute :3
Thanks for your tip, I used a toothpick before but I realised it scraped in a bit deep and didn't leave a nice finish . New follower <3
> flying high:
geebambino.blogspot.com
Very cute and I like the Qtip idea.
Thanks girls!! ♥
^__________^
Wow thanks for sharing this tutorial, I'm gonna try it right away <3
Post a Comment